Starting Your KuCoin Thailand Journey (Thai Nationality)
Step 1: Sign Up for a KuCoin Thailand Account
Step 1: Sign Up for a KuCoin Thailand Account
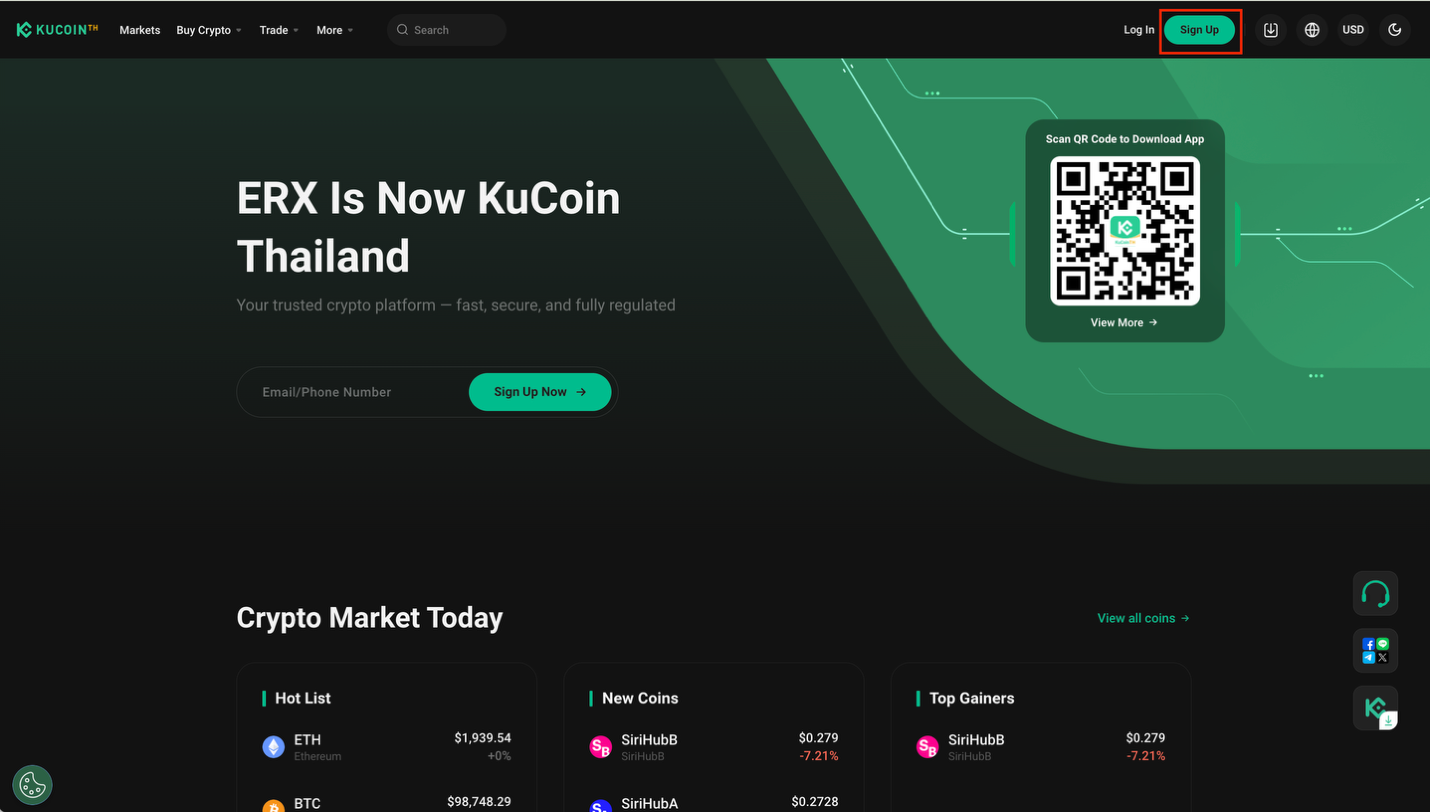
Visit the official KuCoin Thailand site or Scan QR code for download KuCoin TH application and select “Sign Up” in the top right. You can sign up with either an email or a phone number.
1. Sign Up with Email/Phone Number (Web/App)
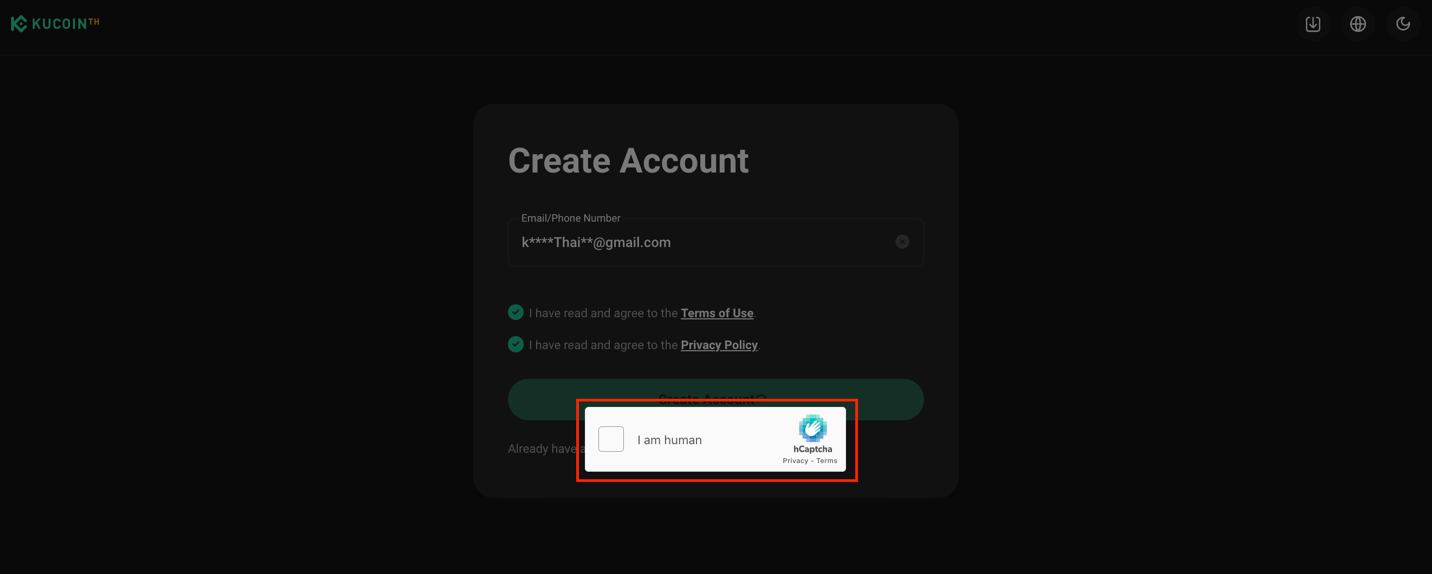
From the KuCoin Thailand homepage on either the web or app, enter the email/phone number you wish to sign up with. Check the box to agree to the Terms of Use and Privacy Policy, then select Create Account
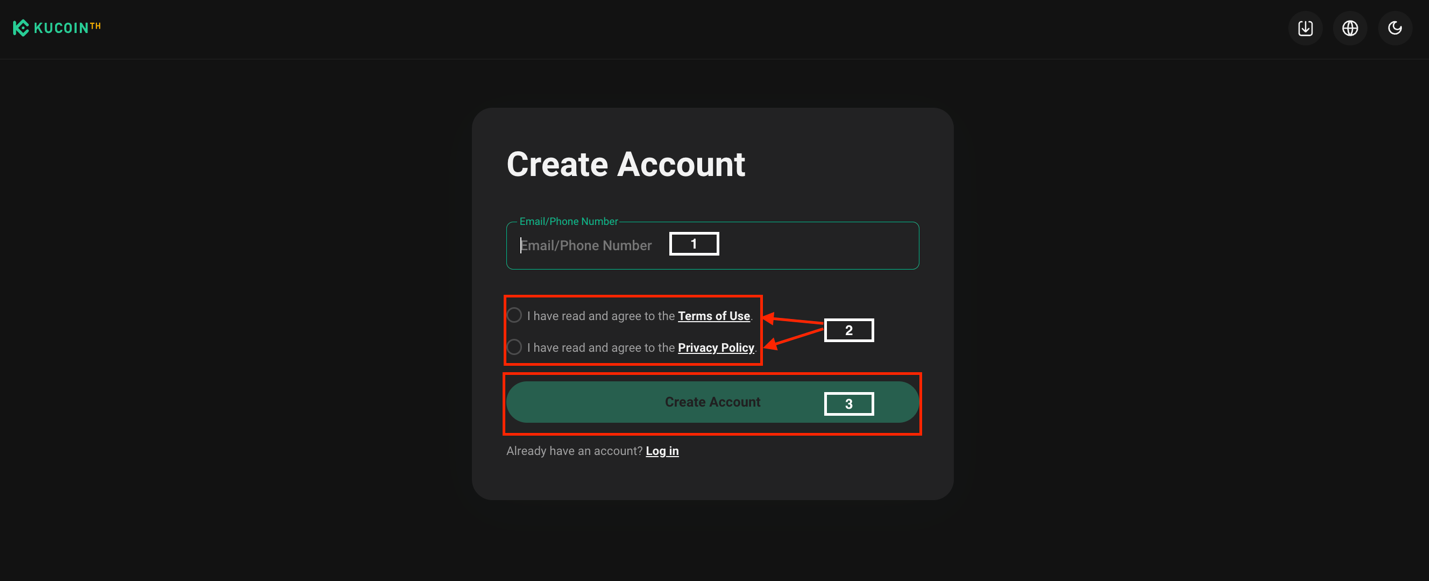
Note: If your email or phone number is already in use with another account, it cannot be used again.
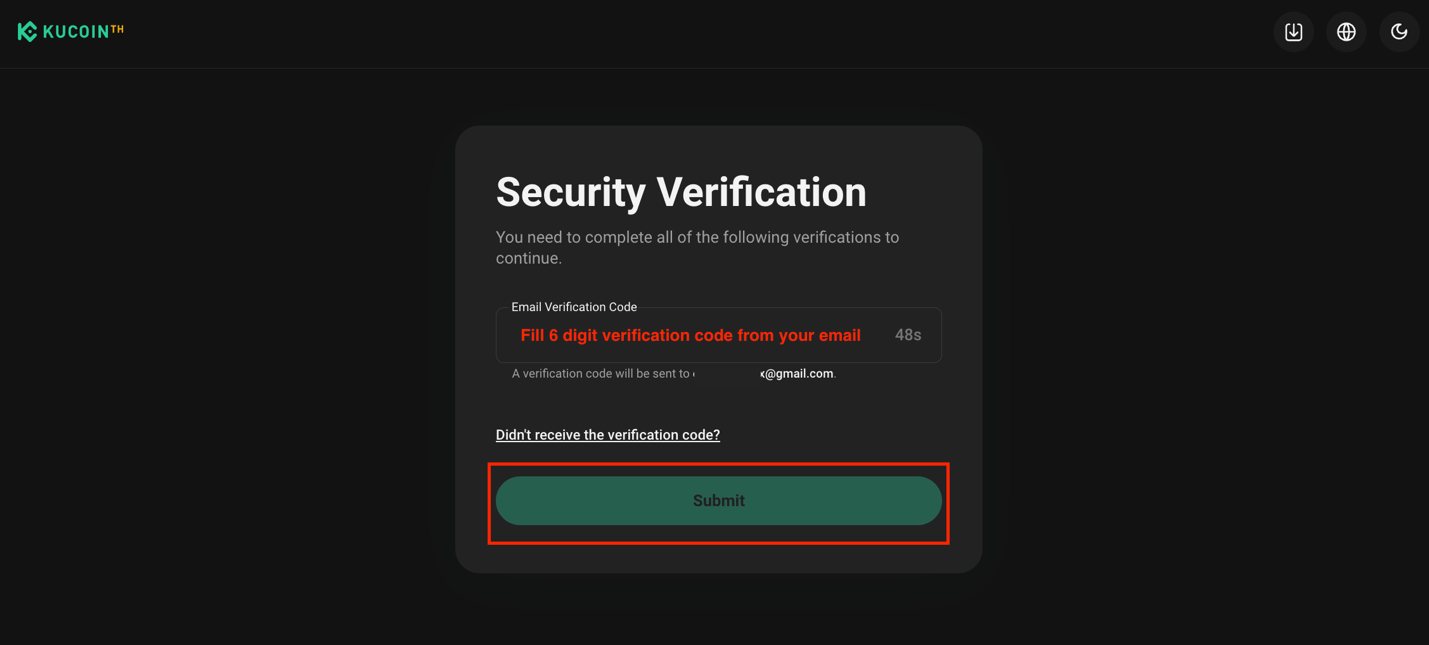
2. Click “I am human”
3. After verification, you will receive a 6-digit verification code in your email, set up your login password, and then select Confirm to finish.
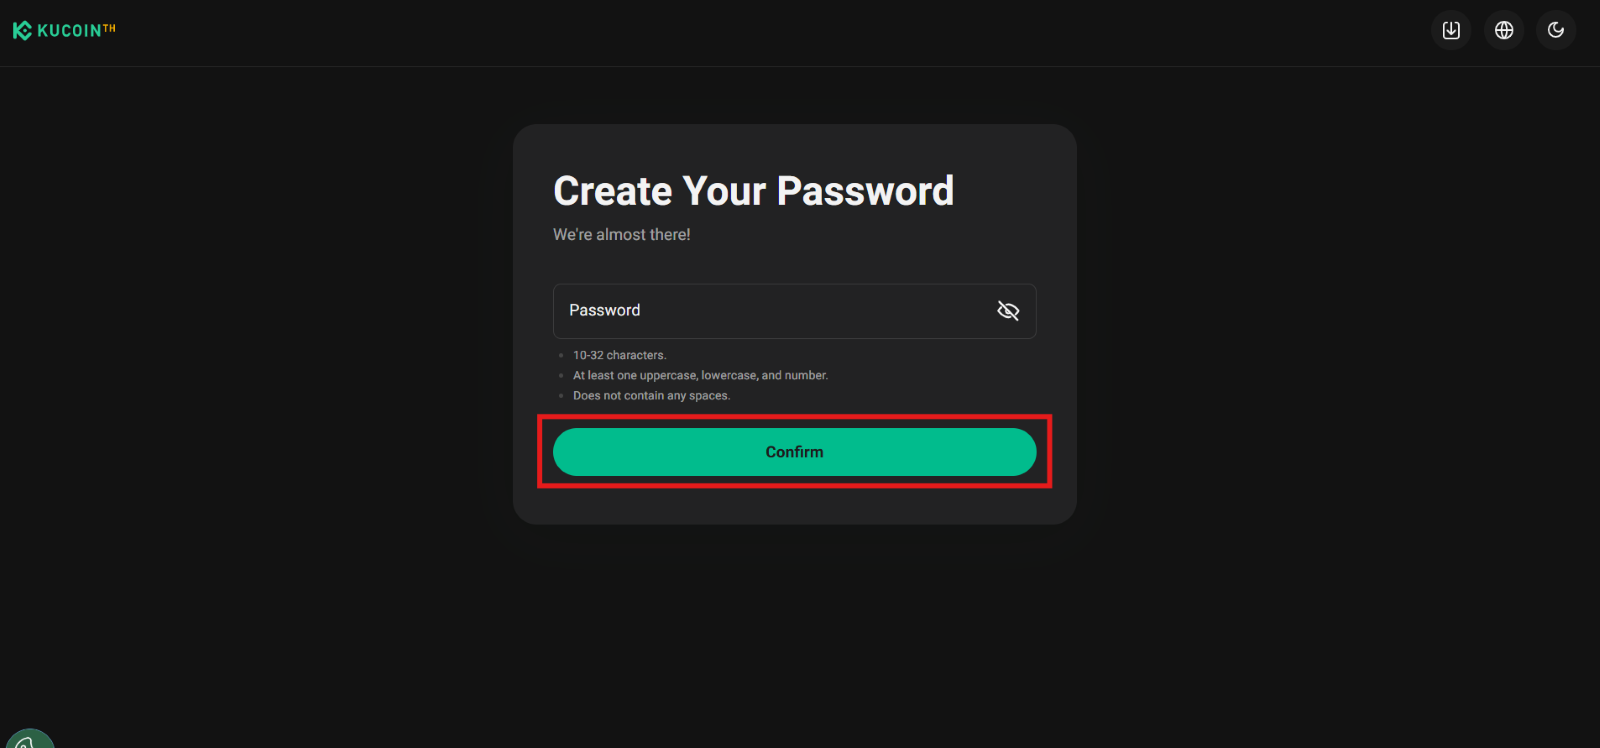
*The password must be 10-32 characters length, contain at least 1 uppercase letter, at least 1 lowercase letter, and at least 1 number
4. Once you’ve signed up for an account, your account has been successfully registered with KuCoin Thailand’s.
Step 2: [Set Up Security] Linking Your Phone
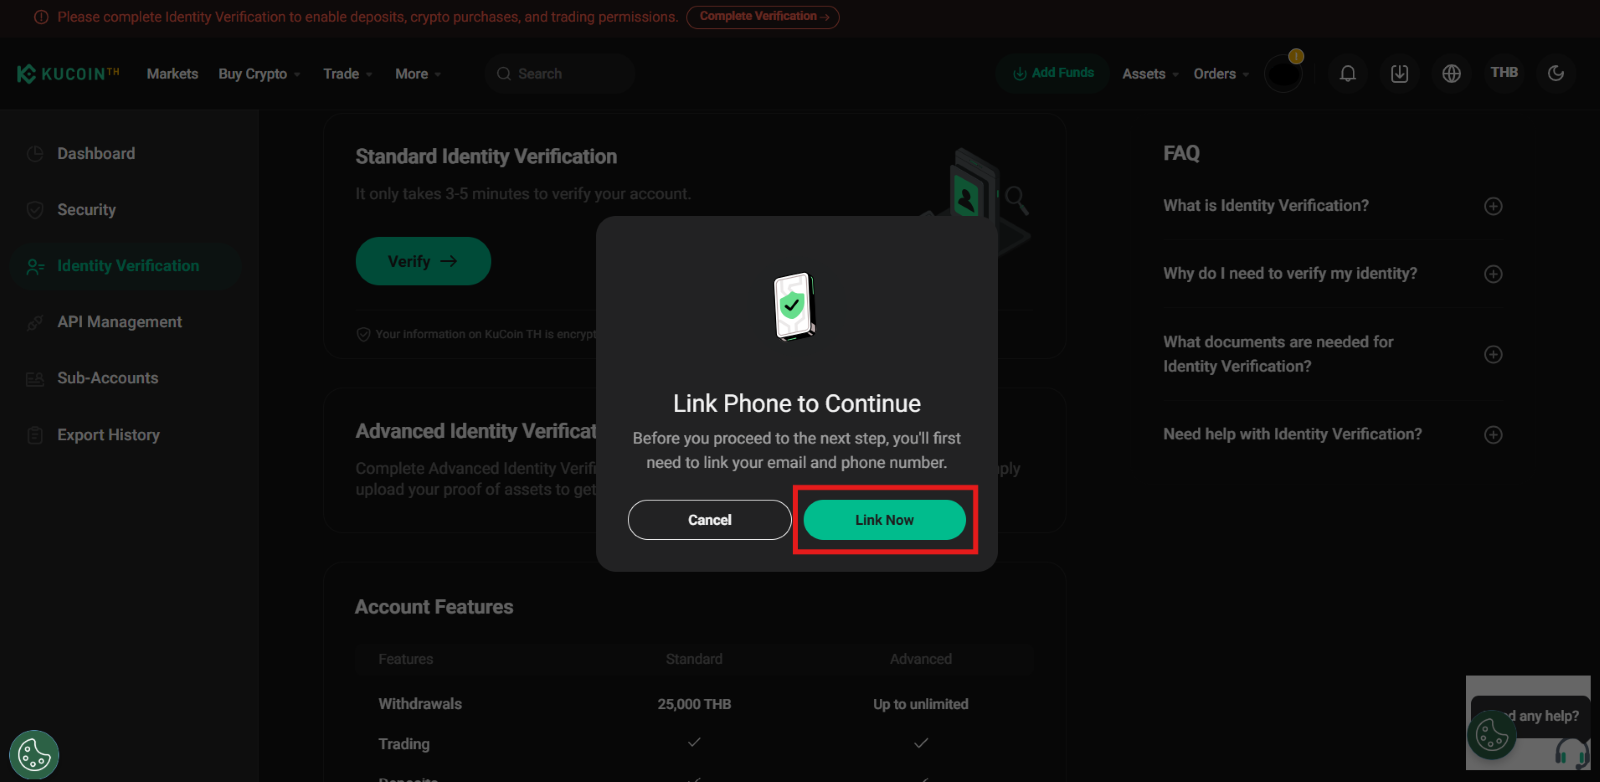
1.To better protect your account, link your phone number as a verification method. Having multiple security measures lowers the chances of a security breach.
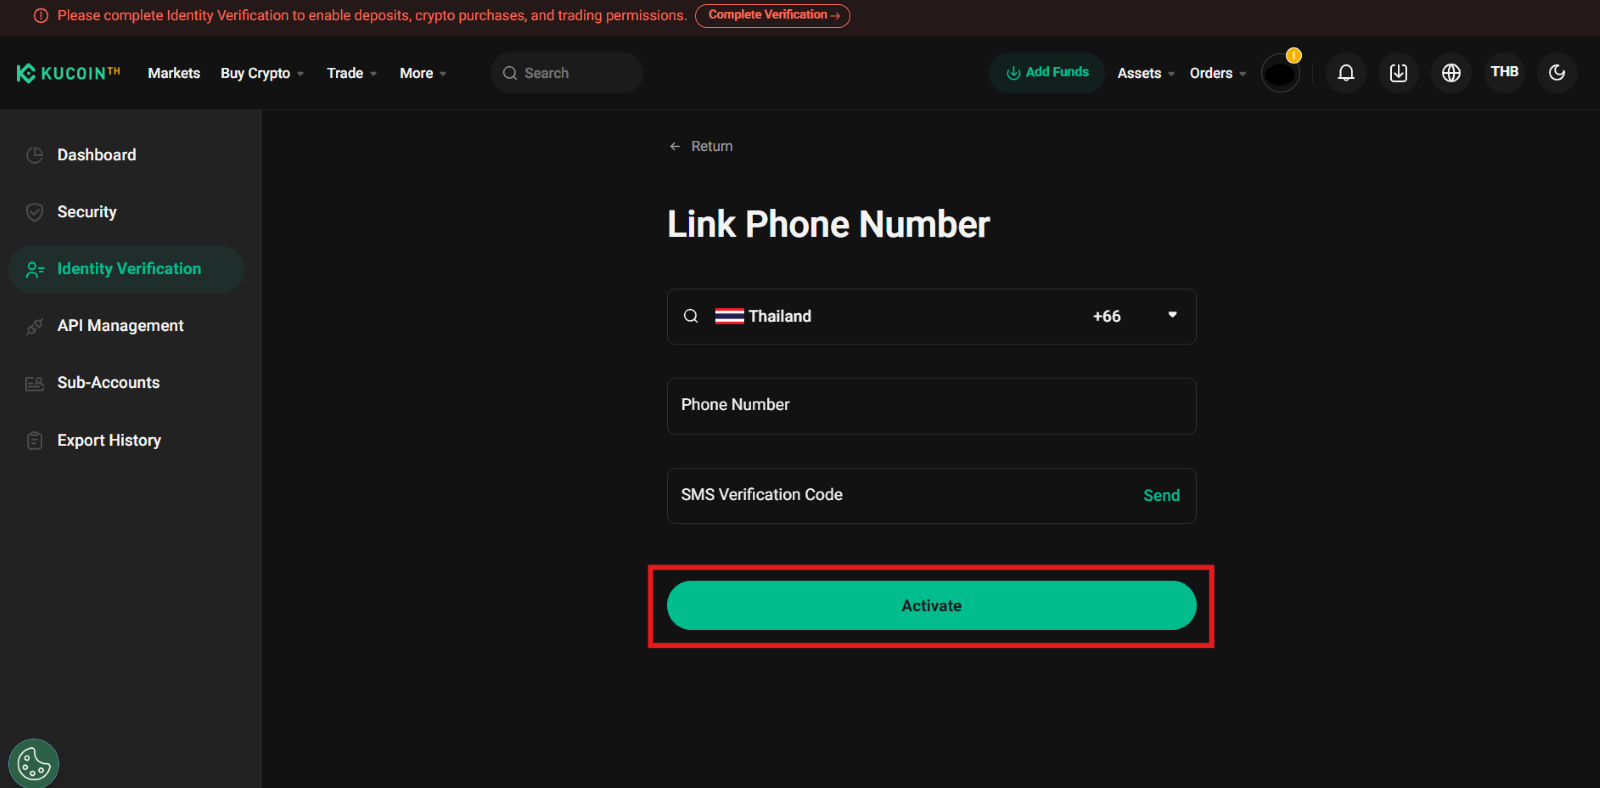
2.Click “Send” to send a verification code to your registered email address. Enter the verification code in the email verification code field, then click “Continue”.
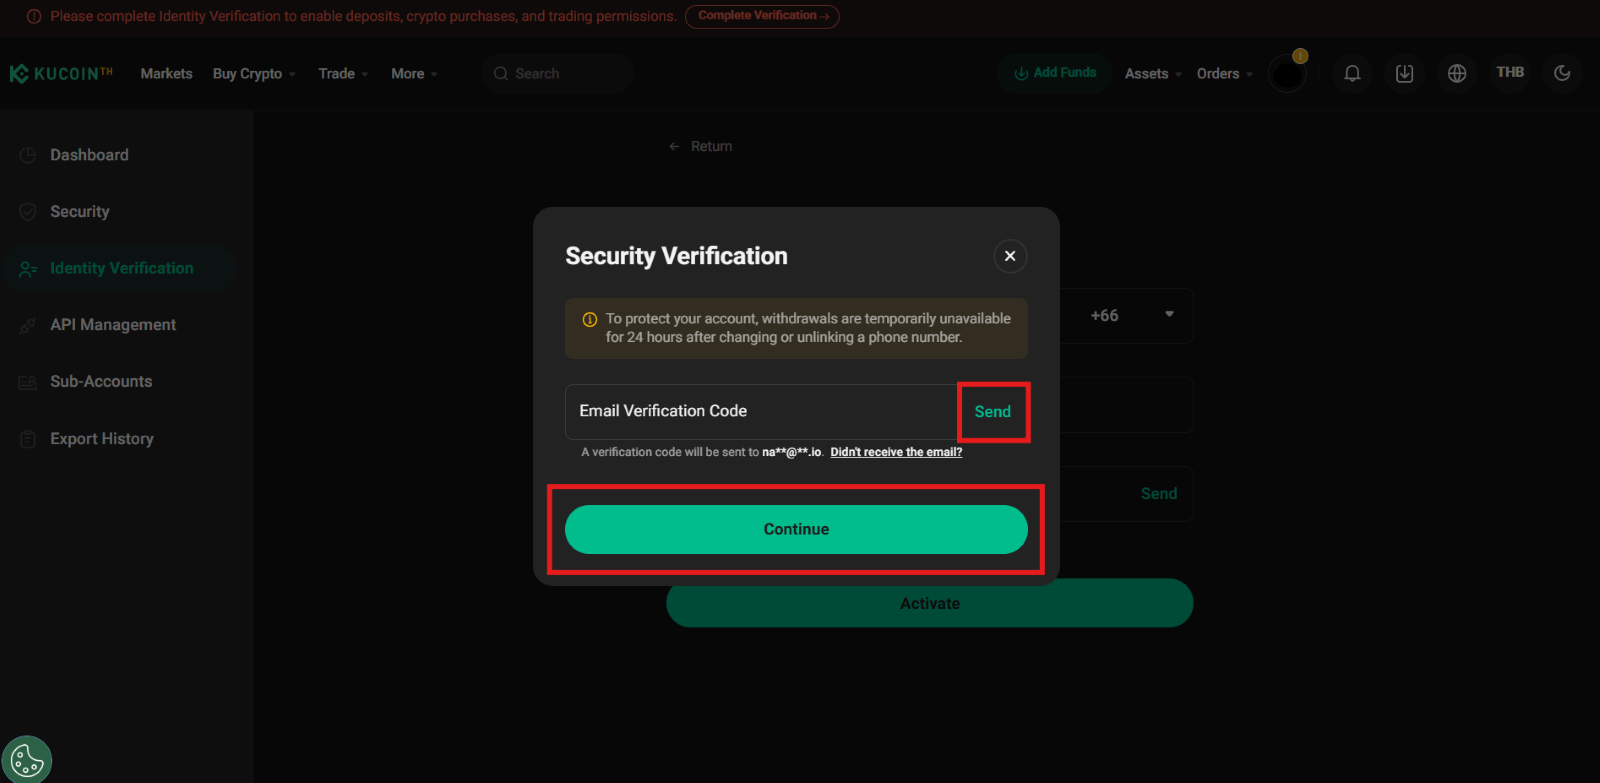
3.The code should then be sent to you via text message. Enter the six-digit code and hit Activate. Verification codes expire in 10 minutes. Enter the verification code in the verification code field and then click “Activate”.
Step 3 : [Login] How to Complete Identity Verification your KuCoin Thailand account
Visit the official KuCoin Thailand homepage on either the web or app and select Log In from the top right. You can log in via your account details or by scanning a QR code.
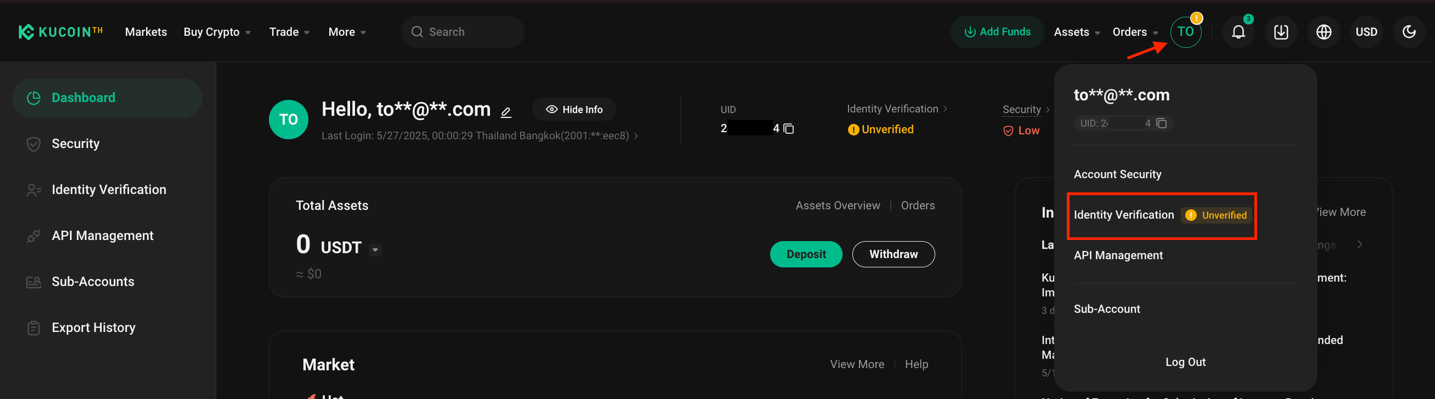
1.Log in to your KuCoin TH account and click [Profile] - [Identity Verification]
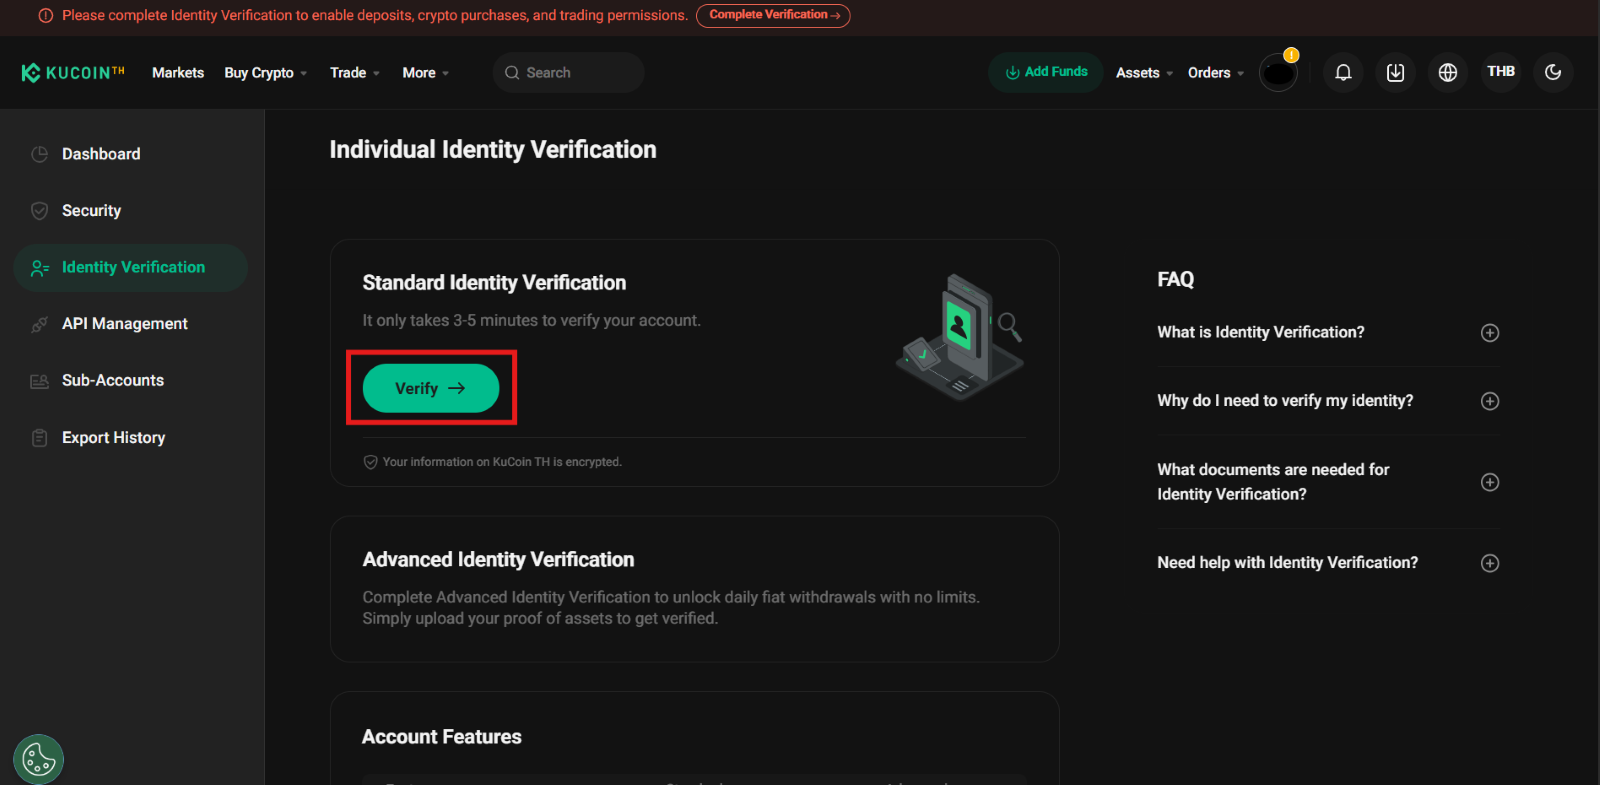
2. Then Click on “Verify”
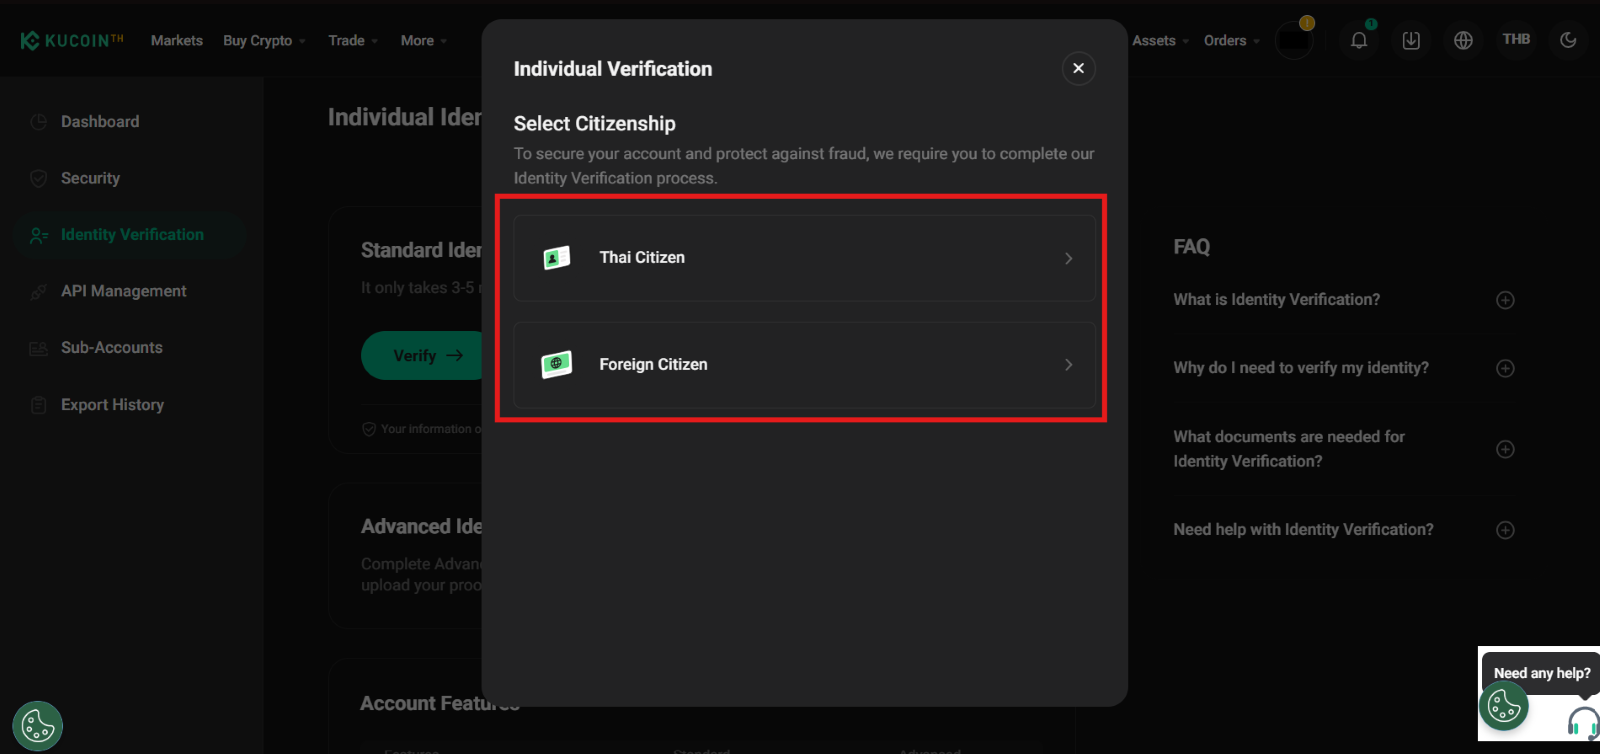
3. The screen will display a notification prompting you to choose whether you are verifying your identity as a corporate client or an individual. Select [Individual].

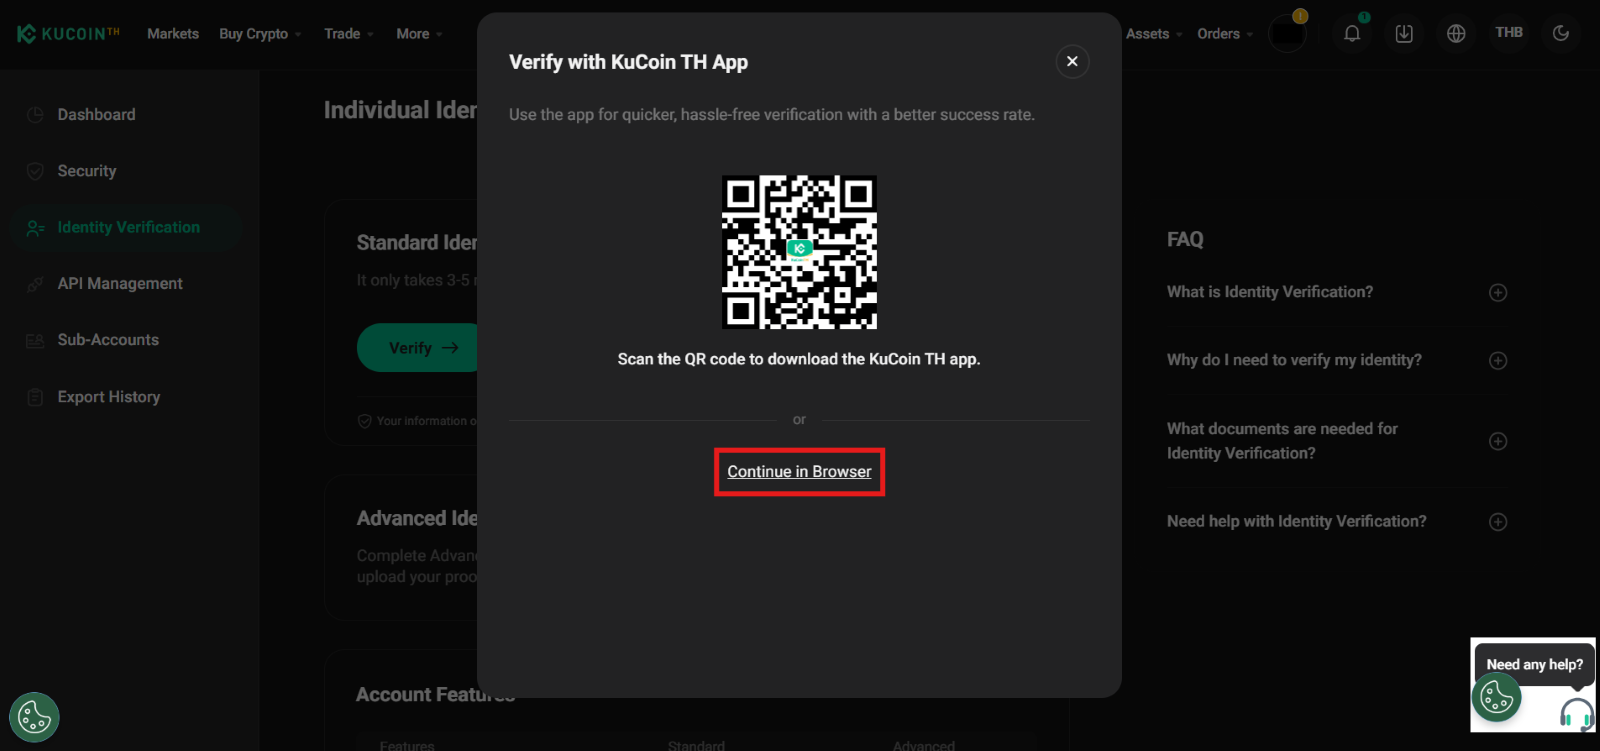
4. Select Citizenship: Thai Citizen or Foreign Citizen. Select [Thai Citizen]
5. Then click “Continue in Browser”
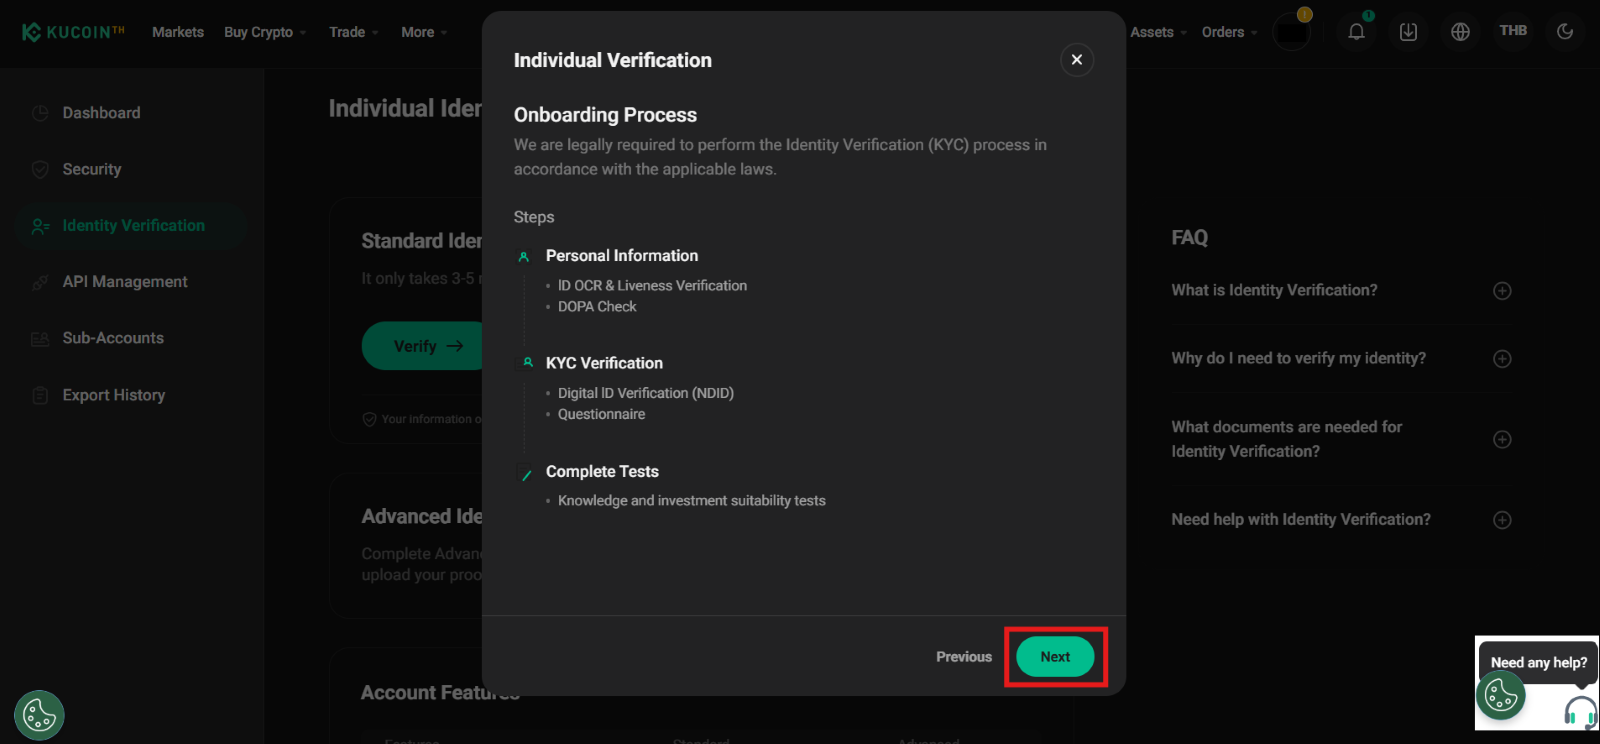
6. KuCoin Thailand support National Digital ID or NDID service only for verification of Thai nationals

Note: Before proceeding with NDID, please ensure that you must have completed the NDID verification with a provider in Thailand prior to the use of this method on KuCoin Thailand.
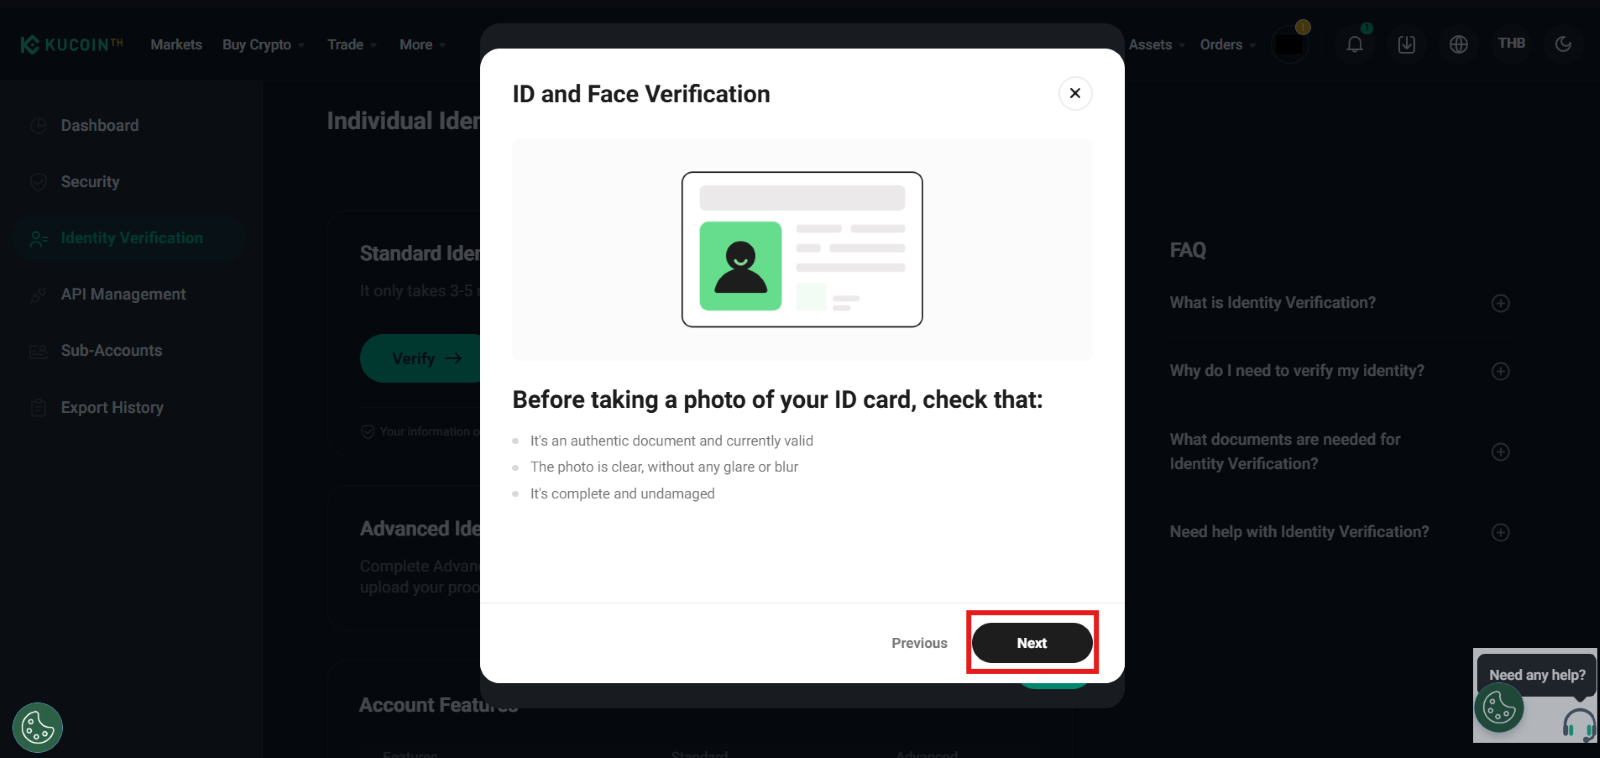
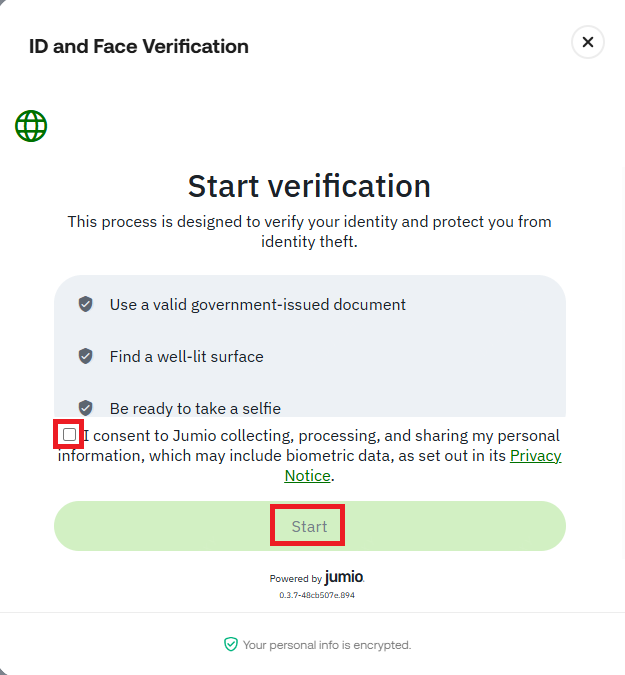
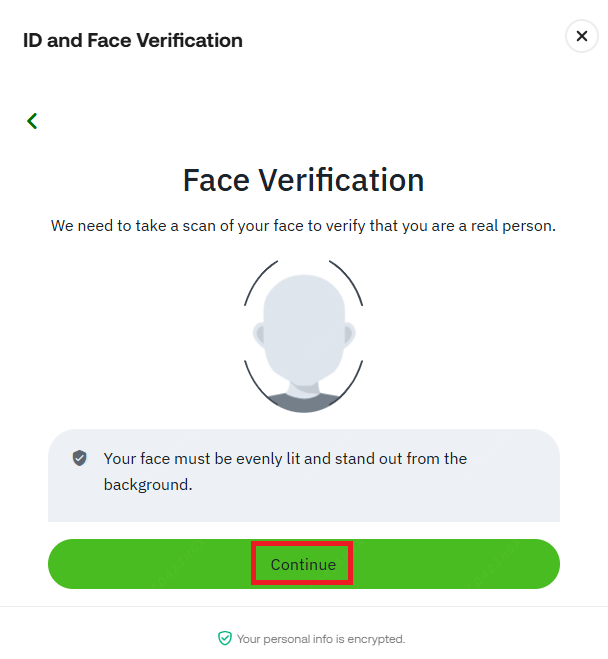
7. Read the guidelines before taking a photo of your Thai national ID, and complete the face scan via the Jumio system and click “Next”.
8. Follow the instructions to photograph your document. Your photos should clearly show the entire ID document. You have to take photos of the front and back of your ID card. Please ensure that the face photo on your ID card is clearly visible. If something is unclear, choose [Retake]. Otherwise, proceed by selecting [Next].
8.1 Next, you agree to the consent to proceed with capturing the front and back of your ID card, as well as taking a facial verification photo.
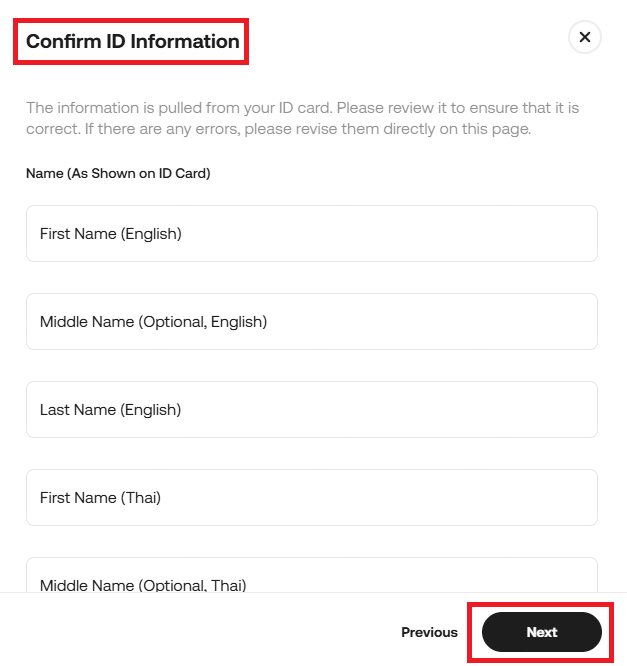
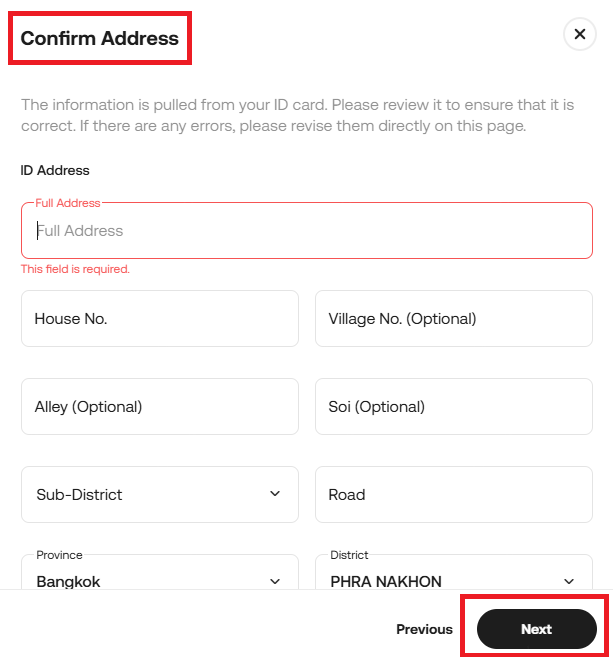
8.2 Please fill in your personal information, including your name and address. Once all information is complete, select [Next] to continue.
Note: Please enable camera access on your device.
9. Next, you need to accept Terms and Conditions by NDID
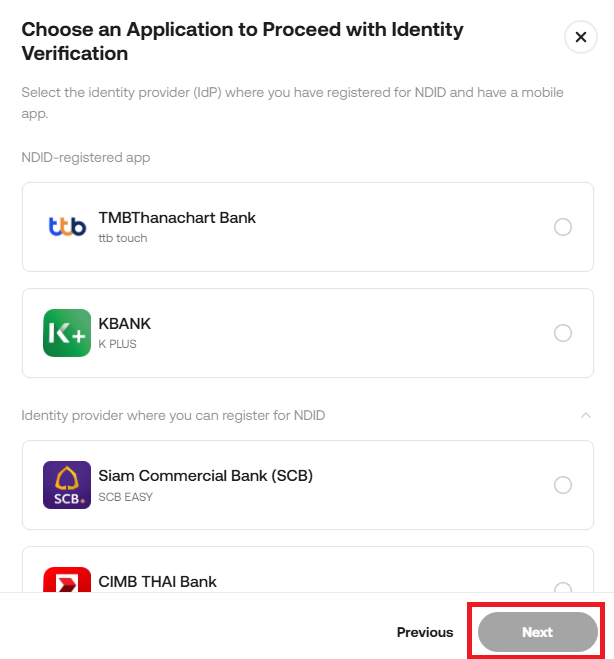
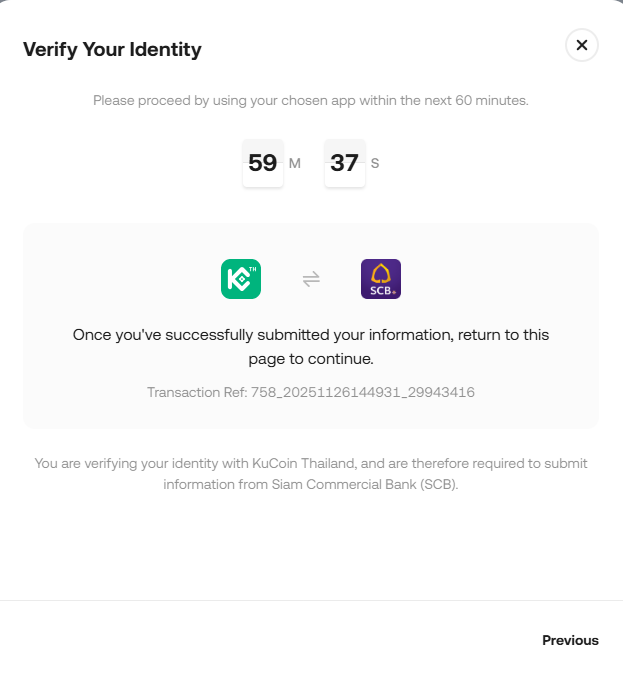
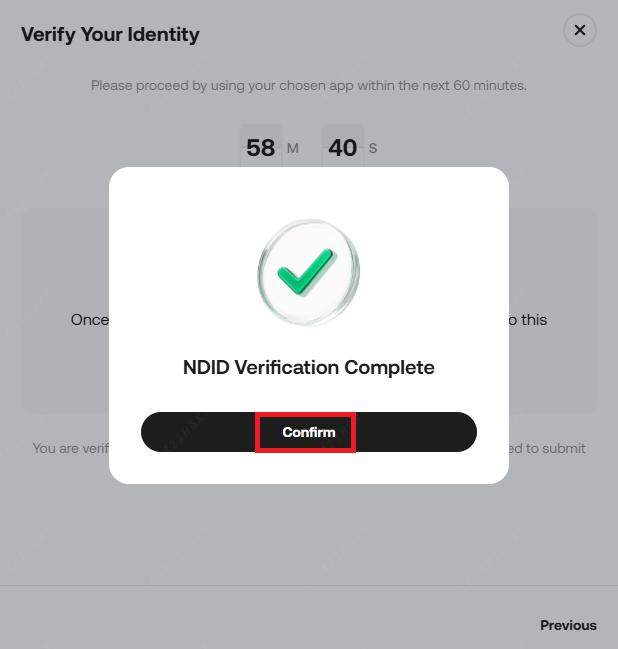
9.1 Select your bank that provides NDID services. After choosing the bank, click [Next]. You must complete the process within 60 minutes. Once the process is successfully completed, click [Confirm] to proceed.
10. Please fill in your occupation, income range, work address, and the purpose for opening the account. Once all information is completed, select Next.
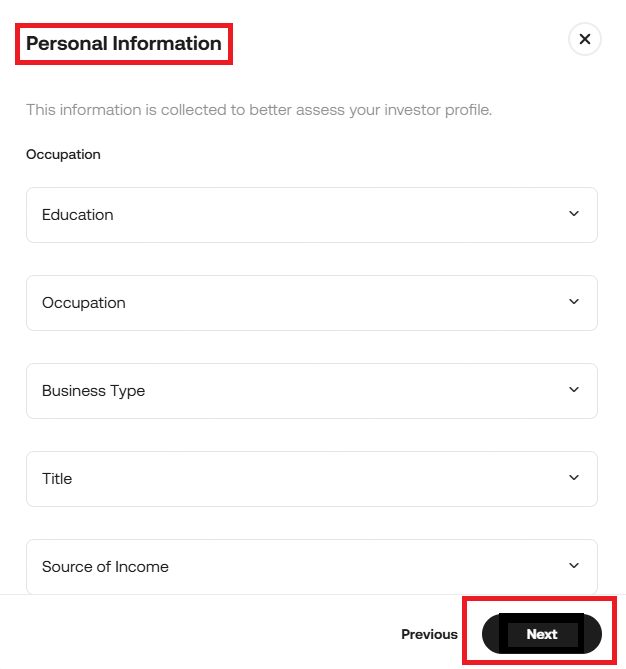
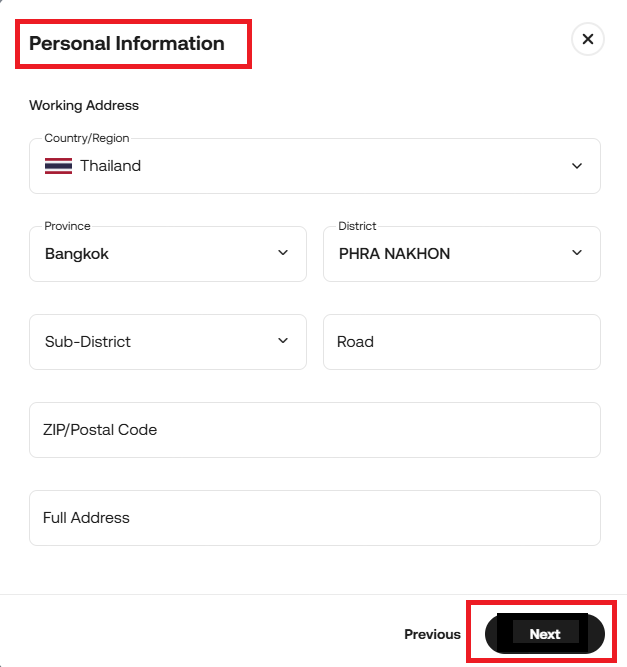
Note: Please make sure all personal information and occupation provided in the Identity Verification process is accurate to complete your account opening quickly and smoothly.
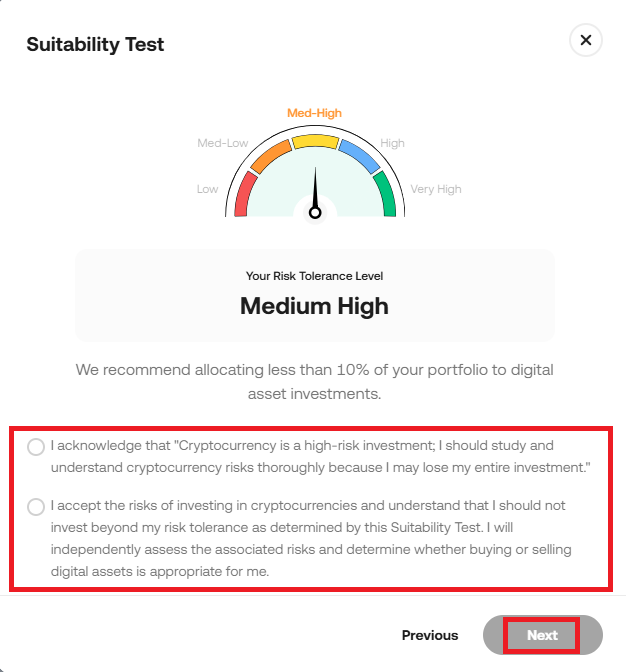
11. Complete onboarding testing process; Suitability Test and Knowledge Test


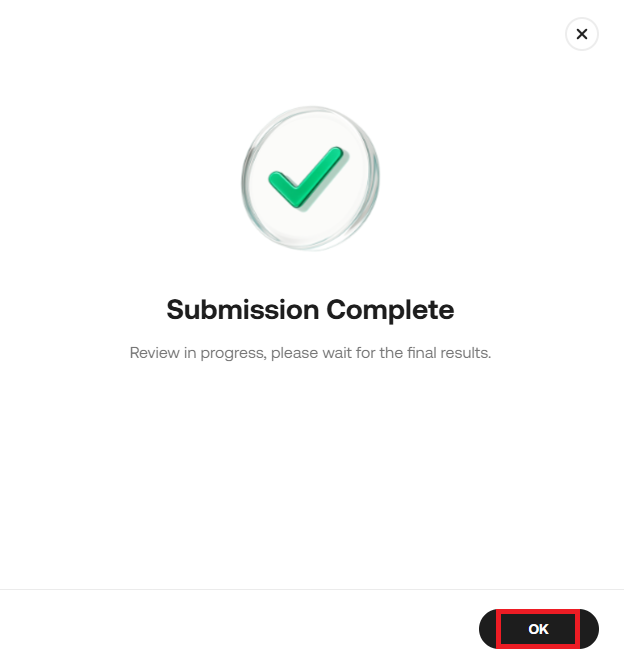
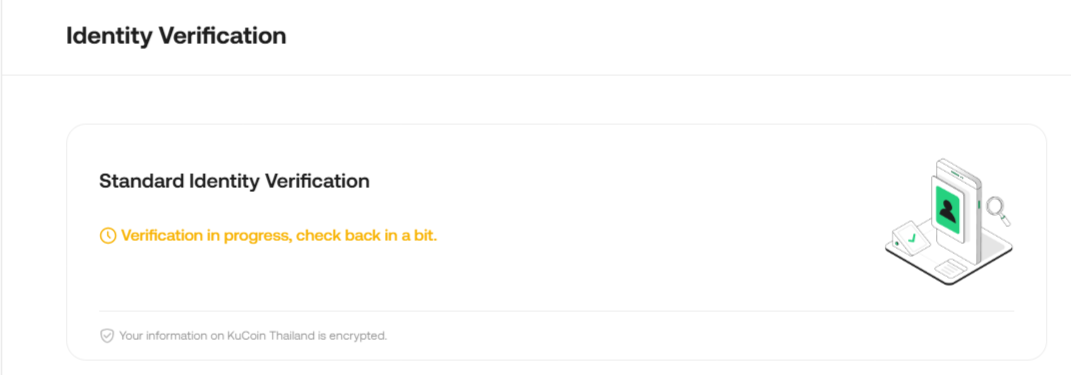
12. The screen will display a confirmation that your account in progress. Our staff will review your information within 3–7 business days.